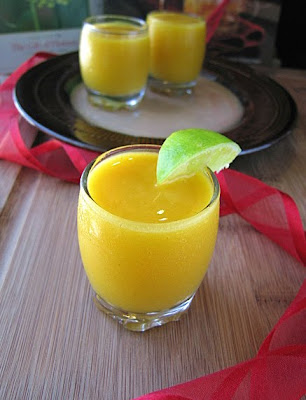
| Home |   | About |   | A Kitchen Witch? |  

Monday, September 27, 2010

Delicious Date Bars

Date Bars 10

Hello Dearies! I really should be doing other things right now like packing boxes (smile), however, I wanted to quickly post these wonderful date bars. This label of 'wonderful' is not only granted due to the deliciousness of these bars but because of their healthful qualities. Plus, they are so easy to make! Cauldron Boy has already requested another batch, but he's going to have to wait on that one for at least a day or two, as we are at least supposed to be packing for our move;)


Here's the recipe:

Delicious Date Bars-Makes 9 Bars
1 Cup Dates (packed)
3 Tbsp. Honey
3/4 Cup Water
1/4 Tsp. Cinnamon
Pinch of Cloves

3/4 Cup Organic Spelt Flour
3/4 Cup Organic Rolled Oats (not instant)
1/4 Tsp. Baking Powder
1/8 Tsp. Sea Salt
1/4 Tsp. Cinnamon
1/8 Tsp. Cloves
4 Tbsp. Earth Balance or Organic Butter
3 1/4 Tbsp. Agave Nectar or Maple Syrup*
*Honey will not work here, as it is too thick.

Preheat the oven to 395 degrees & grease an 8 by 8 inch Pyrex baking dish.

In a bowl, combine the flour, oats, salt, powder, and spices-mix. Work the cold butter in with your hands till it looks like you have a pea like texture. Add the agave nectar and stir with a fork-the liquidity of the nectar or syrup will moisten the mixture enough for it to press out nicely. Take a little over half of the mixture and spread it out evenly in the bottom of your greased pan. Press down with your hands. Keep the rest of the crumble mix set aside in the bowl.

In a small pan or pot (not a medium or large one, as your water will steam off too quickly), place the water, dates, and honey. Bring to a boil. Once boiling, stir and bring the heat down to a low simmer. Use a wooden spoon to break down the dates while stirring for about 5-7 minutes. Remove from the heat. Note: do not over cook or your dates won't spread. You want this concoction to look like a moist date frosting.

Dollop the date spread over the pressed crust in your pan and smooth it out evenly with a wet icing spatula. Now take the rest of the crumb mix and spread it over the pan. Lightly pat it to make sure it sticks to the date layer below. Place in the oven and cook for 15-17 minutes or until golden.

Allow to cool for at least a couple of hours on a wire rack before slicing. Enjoy!


Saturday, September 25, 2010

Cold Season & Smoothies?!

Blackberry Smoothie

Good Morning, Dearies! I hope you are all having a relaxing Saturday.

We are now officially in the first days of Fall, my lovelies, and I want to broach a very important and often overlooked health issue. An issue that will effect almost every single one of you this coming season either directly or indirectly. This subject is the health of your/the gut! Yeah, I know that sounds a bit weird, but it simply means the digestive system (smile).

Why does one need to worry about the health of the digestive system particularly in the Fall & Winter? Well, this is the time of year when we often get sick with either a virus or bacteria at least once if not twice. A visit to the doctor often involves a round of antibiotics if we have come down with something like strep throat, pneumonia, bronchitis, or the like. Sometimes, we even walk away with quite a strong dose of antibiotics when the M.D. is unsure of what ails us.

A round of antibiotics is often needed for certain ailments-no doubt. However, we must remember that antibiotics of any kind do not discriminate when they flow through our systems. They kill our stomach, intestinal, and even vaginal flora (natural & protective bacteria) just as quickly as they slaughter that streptococcus or other harmful bacteria that has invaded our system. The immediate results can be anything from a severely upset stomach to diarrhea and yeast infection. The long term effects are much worse. Indeed, I could write a book about them being that they range from obesity to malnutrition. I've decided that wouldn't be prudent on this lovely Saturday though...

Instead, I ask that you still include a nice treat of organic dairy or soy yogurt and the like with fresh fruit at least every other day, even though you may not be craving cold yogurt and fruit quite as much now that the heat is dying down. The probiotics from the yogurt will keep your gut healthy while the fruit provides a powerful dose of essential minerals and antioxidants like Vitamin C, which will ward off sickness to some extent anyway. Who knows? You might even be able to avoid antibiotics altogether this year!


Frozen Fruit Smoothie-2-3 Servings
1 Cup Organic Frozen Fruit (Preferably Fresh Frozen*)
1 Cup Organic Soy or Dairy Yogurt
Organic Dairy or Soy Milk to taste
1-2 Tbsp. Agave Syrup/Honey
Pinch of Cinnamon

Place the fruit and yogurt in a blender. Blend till smooth. Slowly add sweetener to your taste. Upon seeing the consistency, add milk in splashes till you reach your desired texture and consistency-some like it thick while others like to slurp through a straw! *Fresh frozen means fresh fruit placed in a plastic bag and thrown in the freezer the night before for smoothies!
Note: The mango smoothie shown here was made with fresh frozen fruit from the recipe above with an added tsp. of fresh ginger-it was amazing;)!


Other probiotic rich foods are tempeh, sauerkraut, and kombucha!
p.s. To my lovelies on the other side of the globe entering into summer, I wish you sunny days with many smoothies;-)!

Friday, September 17, 2010

Stellar Vegan Sausage

Vegan Sausage

Hello Everyone!

I wanted to share a couple of vegan recipes with you all that I really enjoyed this last week. Oh, and they are, of course, Cauldron Boy approved too! Cauldron Boy is a bit more open to vegetarian and omnivore foods, so I like to think the vegan food is pretty good when he's liking it and asking for seconds;)

First, is my 'Stellar Vegan Sausage'. I really like this recipe, as it is easily made with ingredients that most people have in the cabinet save the liquid smoke. The recipe is also nice in that these really do look like sausages and taste a lot like them too. The only downfall is that the texture isn't really like sausage. The upside of the downside is that the texture is that of a delicious bean patty, so no worries (smile).

Stellar Vegan Sausage-Serves 2
1 15 oz. Can Organic Garbanzos (drained)
1/2 Cup Rolled Oats
1/4 Cup Raw Sunflower seeds
2 Tbsp. Red Onion (chopped)
1 Tbsp. Low Sodium Soy Sauce
1/2 Tsp. Cumin
1/4 Tsp. Dried Thyme
1/4 Tsp. Paprika
1/4 Tsp. Garlic Powder
1/2-1 Tsp. Hot Sauce
1/2 Tsp. Liquid smoke*
3 Tbsp. Water

*If you are vegan, be sure to use a brand of liquid smoke that is actually vegan like Colgin, etc.

In a food processor, place the oats and sunflower seeds. Process for about 7-8 seconds-that's it! Then add the rest of the ingredients. Process to a course looking meal. This probably took me about 10 seconds. It will be different from processor to processor. Just don't process down to a cream, as the mix will be difficult to work with and form into patties. You want the mix to be processed but still meal like.

Form into patties. Sprinkle with extra paprika and sauté in about one Tbsp. of olive oil on medium heat (low heat will cause for greasy patties). Allow each side to sizzle for about 2-3 minutes. Enjoy with ketchup, mustard or whatever you like!


The next recipe is a Vegan Bearnaise Sauce. This sauce was really lovely over our steamed broccoli and cauliflower.


Vegan Bearnaise-Serves 4
1 1/4 Cups Unsweetened Almond Milk
1/2 Cup Raw Cashew Pieces
2 Tbsp. Nutritional Yeast
1/2 Tbsp. Dark Soy Sauce
2 Cloves Garlic
Hefty Pinch of Black Pepper
Hefty Pinch of Dry Tarragon Leaves
1/4 Tsp. Sea Salt
1/4 Tsp Turmeric (color)

Note: Some people like to add a tbsp. of melted Earth Balance to the mix for extra creaminess.

Place all of the ingredients into a blender and blend till very smooth. Place the contents of the blender in a sauté pan or pot on low heat. The Bearnaise will look watery and not quite right. Don't worry. Bring the heat up to medium high stirring constantly. The mix will almost immediately begin to start changing to a cream texture. Once you reach your desired creaminess and texture, remove completely from the heat. Serve over your favorite steamed fresh vegetables and such.

Enjoy, my lovelies!

Wednesday, September 15, 2010

Florida Avocados (That Big Avocado!)

Florida Avocados

Florida Avocados a.k.a. Big Avocados!

Well, I don't really know if other people call them 'Big Avocados', but that's pretty much what they are, Dearies. A Florida avocado is a large variety of avocado grown in Miami-Dade and Collier counties for commercial production. Although one can easily find one of these trees just walking through a neighborhood here in Florida. Indeed, I have one here in my subtropical hollow right outside my front door! But despite the abundance of these trees here in the sunshine state, Florida Avocado trees are indigenous to Mexico and parts of South America.

Either way, the fruits of this tree are delicious and so very healthful. There are a few different cultivars of this fruit, but on average a Florida avocado has about 50% less fat than its very popular cousin, the Hass avocado. They are also super rich in Fiber, as one of these lovelies has about 17 grams of crude fiber. That's impressive if one considers that the daily recommended value of fiber for one person is between 20-25 grams.

How to use: A Florida avocado is usually ready to be placed on sandwiches and/or wraps and mixed into guacamoles when they darken in color. Though I have had one that stayed quite green-I realized it was ready only due to touching it and feeling a softness in the flesh below the skin. So place them on a sunny window seal or next to some ripe bananas (the gases from the bananas will cause ripening). Feel them once or twice a day to see how they are coming along. I almost always notice mine seem to be somewhat dark and soft to the touch about 2 days after purchase.

Here's a recipe:

Florida Avocado Guacamole-Serves 3-4
1 Large Florida Avocado (fleshed)
1-2 Tbsp. Organic Mayo or Vegenaise
2 Tbsp. Red Onion (minced)
1 Tbsp. Fresh Cilantro (chopped)
1 Clove Garlic (minced)
1-1 1/4 Tsp. Cumin
1/2-1 Tsp. Sriracha or Chili Garlic Sauce*
1/2 Tbsp. Red Wine Vinegar
1/4-1/2 Tsp. Salt

*One can also just use red and black pepper to taste in order to add spice...

Place all of the ingredients above in a large mixing bowl. Mix with a fork and use the fork to break down the avocado flesh to your desired consistency. Taste and adjust seasonings as desired. Eat immediately! If some is leftover, be sure to place plastic wrap immediately up against the guacamole in addition to covering the container with a lid and/or plastic wrap.

Enjoy!


p.s. Florida avocados are in season now and through the winter here in the states!

Sunday, September 12, 2010

Los Bombones de Marly

date balls real

Marly's Bonbons!

This post is sort of a follow-up post to my 'Sugar Addiction & Scary Things' post. Some of you may have read my thoughts on sugar and excess carbohydrates in reference to body chemistry. Although the hefty length of that post might have discouraged quite a few of you;). Either way, I've been avoiding all cane and beet sugars (refined or not) along with things like A.P. flour, white rice, white bread, & the like.

I must say that it was hard at first. Not only in the realm of addiction and cravings either. Though I had plenty of that-no doubt. It was also hard as someone who blogs though. I mean, baking was and is such a large part of my culinary life. And it's hard to no longer be able to strut over to the kitchen and bake up something wonderful with my existing culinary knowledge that makes baking so very easy to do when sugar and A.P. flour are on the scene.

All of sudden, I've had to actually think about what I'm going to bake and how!? And this involves a lot of research, experimenting, failures, happy surprises and the like. It also involves me having to come to terms with the fact that I'm not going to have a picture of some lovely yellow cake smothered in rich milk chocolate on FoodGawker. Well, I might. If my experimenting goes as planned...

Till then, I made Ms. Marly's lovely, no-bake date bonbons! They are so easy & delicious. Plus, I don't have to feel bad about eating them. Well, not unless I eat a whole lot them!


Marly's Bonbons
2 Cups of Dates (Deglet Nour)
2 Cups of Raw Nuts*
1/4 Cup of Organic Cocoa**
2 Tbsp. Coconut Flakes
1/4 Tsp. Orange Blossom Water + some for hands
Sesame seeds, desiccated coconut, crushed pistachio/almond, cocoa for rolling

*I used raw cashew pieces.
**Green & Blacks Organic Cocoa is excellent!

Place dates and nuts in a food processor and process until quite smooth-this took me about 1 full minute to do, though it may take more or less time depending on the processor. Once pretty smooth, add the orange blossom water, coconut flakes, and cocoa. Process for another 30-45 seconds or until smooth.

Once your mixture looks smooth or at least to your desired consistency, pour a touch of orange blossom water onto your clean hands (the water helps with rolling while perfuming the bonbons). Take about 1-1/2 Tbsp. of date mix and roll between your palms till you have a nice ball. Roll the ball in coconut or desired coating. Repeat this process till done.
Note: You do not have to continually put orange blossom water on your hands-just when they feel too sticky to roll a smooth ball.

Enjoy!


Note: Marly does not use orange blossom water in her recipe. If you do not have any, do not let this discourage you from making these wonderful, healthy treats!

Friday, September 10, 2010

The Spicy Mango

Mangoes

This post is to serve as my entry into the very sexy drink challenge hosted by the lovely Denise of Quickies on the dinner table and the awesome Lazaro of Lazaro Cooks! The prize is a copy of Denise's cookbook, which is pictured below. I have a copy of it myself, so I know first hand how wonderful the recipes are. Plus, it really is a beautiful book.


As some of you may remember, I spent last weekend in South Florida. It was a busy trip of errands and just taking care of responsibilities and such, so there wasn't much time for relaxation or experiences of enchantment. However, while running around one afternoon, I spotted a tree from a distance that had some type of fruit hanging from it. I decided that it was a mango tree but moved on due to traffic. Luckily, just a bit later I came upon another one with the biggest & most beautiful mangoes I had ever seen in person. And, yes, this moment was enchanting...

So I took some, Dearies, and I made this drink! And it was good *smile*. Although I think my pictures are more cute than sexy. 'Cute' can by sexy though sometimes, right?!


Here's the recipe:

The Spicy Mango Cooler
1 1/4 Cups Frozen Mango
1/3 Cup Spiced Rum
1/3-1/2 Cup +/- Sparkling Water*
Juice of 1/2 Lime
Pinch of cinnamon

Add all ingredients in a blender and blend till smooth. Taste to ensure you enjoy the consistency. *If too thick for your taste, add a splash more of sparkling water till you reach your desired texture and consistency. I used San Pellegrino by the way. Oh, and if you use frozen mango from the store, you may or may not need to sweeten this a bit with agave nectar, etc.

Enjoy!

*Hiccup* Ooh, excuse me, Dearies!


The Quickies Cocktail Challenge is still open for entries till September 24, 2010. The entry which best exemplifies sex appeal, in a glass, wins!

Tuesday, September 7, 2010

Quick Edamame Soup

edamame soup

I spent my weekend driving around unknown territories in South Florida scoping out the scenery in order to see what the place is all about and such. The trip was strictly business and almost no pleasure, so I'm incredibly beat and my powers are very weak right now, my lovelies. However, it's times like these that my Cauldron does the magic by whipping up something quick, easy, and delicious like my 'Quick Edamame Soup'!

Oh how lovely it is...


Here's the recipe:

Quick Edamame Soup for 2-3
6 1/4 Cups of Low Sodium Vegetable Broth*
1 Cup of Frozen, Organic Edamame Beans
1/3 Cup of Sliced Scallions (greens and white ends)
1 1/2 Tbsp. Garlic (chopped)
1 Tsp. Fresh, Minced Ginger (optional)
2 Small, Organic Carrots (peeled & sliced on the diagonal)
5-6 oz. Rice Noodle Pasta (1/3 a pack of Thai Kitchen Brand)
1-1 1/4 Tbsp. Low Sodium Soy Sauce
1/2-3/4 Tsp. Chile Garlic Sauce
1/4 Tsp. Toasted Sesame Oil
1/2 Tbsp. Peanut or Veg Oil for sauté
Salt to taste
Possible Toppings-cilantro, scallions, chilies, avocado, sprouts, etc...

*Please use a broth that is super low sodium-2-6% sodium is truly low!

In a large soup pot or cauldron, place the 1/2 Tbsp. of veg oil and bring it to medium heat. Once, hot, add the scallions and sauté for about a minute. Then add the garlic, ginger, & carrots and allow to sizzle for about 15-20 seconds more. Add the broth, put the top on at an angle, and bring the heat up to reach a boil. Once boiling, add the Edamame. This will cool the soup down again, so bring it back up to a boil and allow the Edamame to boil with the lid at an angle for only 2 and 1/2 minutes. Remove the lid, stir, and add the soy, chili garlic sauce, and sesame oil. Stir again and add the rice noodles. Once the rice noodles have been added, immediately move the soup from the heat and allow it to stand for about 12-14 minutes stirring from time to time (this is how the rice noodles cook-they just need super hot water, not boiling water!). Salt to taste...

Enjoy!


*Did you know?
-Like the protein found in meat, the protein in soybeans a.k.a. Edamame is "complete," meaning all of the eight amino acids needed for human health are present. Soybeans are the only vegetable that contains complete protein!

Wednesday, September 1, 2010

A Good Cashew Cream

Cashew Cream 7b
Photo above is a cashew cream w/ dark soy on gluten free brown rice pasta made with my Claudia in mind

There is nothing like a good cashew cream, Dearies! Why? Well, it's just a delicious concoction of nothing but good for us stuff that serves as a cream sauce for pasta while also being a protein. I mean, that's just practical. Plus, like I already mentioned, a cashew cream is delicious. And, in this witch's humble opinion, a recipe/concept any vegan, vegetarian, or responsible omnivore should have on hand for so many reasons. I really can't go into all of them without boring you, so I won't (smile).

I do hope that if a cashew cream sounds strange to you, that you especially will try it. I really think you, your waist line, and your skin will thank me for it later *wink*.


Here's the recipe-Cashew Cream for 2:
1 1/4 Cups of Unsweetened, Plain Almond or Soy Milk
1/2 Cup of Raw Cashews
1 Large Garlic Clove
3 Tbsp. Nutritional Yeast
1 1/4 Tbsp. Low Sodium Soy Sauce
1 Tsp Dijon or Yellow Mustard
1/4 Tsp. Onion Powder
1/8 Tsp. Black Pepper
1/8-1/4 Tsp. Sea Salt
Pinch of Dried Rosemary or, even better, Dried Tarragon
Nutmeg for sprinkling
*This is enough cream for 8 oz. pasta!

Boil your pasta according to the package instructions. Note: The photos here show both a gluten free brown rice pasta as well as an organic, whole wheat pasta.

Place all of the above ingredients except the nutmeg into a blender. Blend for about a minute or until very smooth.
Once your pasta is done, pour it into a colander to drain off the water. Shake as you would normally do to ensure most of the water is gone. Place the pasta back into the empty pasta pot along with the contents of the blender. Put the pot back on the stove and bring the heat up to medium. Stir. It will look watery & like you have too much cream. This will change within a minute or usually less, so watch closely stirring till you see your desired creamy consistency. Once you do, immediately remove the pot from the heat.

Serve with salt & pepper, basil, and a pinch of nutmeg. Enjoy!


p.s. This dish is especially wonderful served with a vinegary cucumber or lettuce salad!